
DIY Guide: How to Build a Wooden Shelf from Scratch
Over 63% of Americans prefer DIY projects as a creative outlet. This statistic highlights the growing trend toward woodworking and home improvement among both beginners and seasoned enthusiasts. In this DIY guide, you will learn how to build a wooden shelf from scratch, turning basic materials into a functional and stylish addition to your home. Whether you're after a simple design or something more intricate, this woodworking project will arm you with the essential tips and step-by-step instructions needed to create your own unique DIY wooden shelf. Get ready to transform your space with a personalized touch that showcases your DIY craftsmanship!
Introduction to Building a Wooden Shelf
Embarking on the journey of building a wooden shelf introduces you to the exciting realm of woodworking basics. Creating custom shelving not only enhances your home but also brings a sense of accomplishment. A well-constructed wooden shelf can serve dual purposes, offering both functionality and decorative flair.
Understanding the materials at your disposal is vital. Different types of wood provide varied benefits in terms of durability and aesthetics. Take the time to develop a clear plan, as it will guide your project and ensure success. By grasping the essential concepts and techniques behind building wooden shelves, you set the stage for a rewarding woodworking experience.
Benefits of DIY Wooden Shelves
Creating your own wooden shelves offers numerous advantages that can enhance your living space. One of the primary benefits of DIY shelves is the ability to customize shelves according to your preferences. You can choose the dimensions, finishes, and styles that fit seamlessly into your home's decor.
Cost-effectiveness is another compelling reason to undertake this project. Utilizing readily available materials and your skills leads to significant savings compared to store-bought alternatives. You avoid markup costs while achieving a unique look that cannot be replicated with mass-produced options. This aspect of cost-effective shelving makes DIY projects appealing to both budget-conscious individuals and those looking for something special.
The satisfaction gained from completing a woodworking project is unparalleled. You will feel a sense of accomplishment every time you glance at your handcrafted shelves. This experience not only beautifies your home but also nurtures your creativity and advancing your skills.
Essential Tools for Your Woodworking Project
Before diving into your woodworking project, it's crucial to gather the right tools. A well-equipped workspace allows for a smoother and more enjoyable building experience. Understanding the difference between essential hand tools and power tools for woodworking will serve as a solid foundation for your wooden shelf project.
Hand Tools You Will Need
Hand tools are fundamental for any woodworking endeavor. Essential hand tools help you achieve precision and control, essential for crafting a beautiful shelf. Here are some of the hand tools you should consider:
- Saws - A reliable handsaw, like those from Stanley, will enable you to make accurate cuts.
- Chisels - A set of sharp chisels allows for fine detailing and joint work.
- Measuring Tape - Accurate measurements are key; use a sturdy measuring tape for consistency.
- Square - An accurate square ensures all your cuts are perfectly aligned.
Power Tools for Efficiency
In addition to hand tools, incorporating power tools for woodworking can significantly boost your efficiency. These tools streamline the process, allowing you to complete your shelf construction more quickly:
- Power Drill - Essential for making holes and driving screws, a power drill from DeWalt can make your assembly process much easier.
- Circular Saw - This tool will provide straight, swift cuts, ideal for large wooden panels.
- Sander - Achieve a smooth finish on your shelf with an electric sander, reducing the time spent on manual sanding.
By gathering both essential hand tools and efficient power tools for woodworking, you set yourself up for success in your woodworking project. Having the right equipment not only enhances your skills but also elevates the overall quality of your wooden shelf.
Choosing the Right Wood for Your Shelf
When you embark on your shelf-building journey, selecting shelf wood is a crucial decision. The specific types of wood you choose can significantly impact both the functionality and aesthetics of your shelf. Understanding the characteristics of various woods will help you make an informed choice that complements your interior design.
Types of Wood Suitable for Shelves
Several types of wood suit different needs and preferences. Here are a few popular options:
- Pine: Affordable and lightweight, pine is easy to work with, making it a favorite for beginners. Its natural color can be easily stained or painted to match your decor.
- Oak: Known for its strength and durability, oak offers a beautiful grain pattern. It is perfect for creating sturdy shelves that can handle heavier loads.
- Plywood: This engineered wood is versatile and sturdy. Plywood comes in various finishes and is often used for shelves that require a sleek look without breaking the bank.
Understanding Wood Grains and Colors
The wood grains and colors play a vital role in the shelf's visual impact. Different types of wood exhibit unique grains, ranging from straight and uniform to wild and intricate. Here are some characteristics to consider:
- Grain Patterns: Some woods have prominent grains that add depth and character, while others have subtle patterns that create a more understated look.
- Color Variations: The colors can vary widely among types of wood. For instance, cherry wood deepens in color over time, offering a rich hue that enhances any space.
By focusing on these aspects when selecting your wood, you can create a shelf that not only serves a functional purpose but also beautifully integrates into your home decor.
Measuring and Planning Your Shelf Design
Measuring is a crucial step in ensuring your shelf design not only meets your aesthetic goals but also functions effectively within your space. Accurate measurements prevent costly mistakes during the construction phase. Start by determining the intended location for your shelf. Use measuring techniques, like the traditional tape measure, to record the width, height, and depth of the area, keeping in mind any existing furniture or decor that may affect placement.
Once you gather your measurements, sketch a design that incorporates these dimensions. Creating woodworking plans allows you to visualize how the shelf will look and function. Don't forget to plan for bracket placement or any specific support features in your design, which will contribute greatly to the shelf’s stability.
When planning, consider how many items you will place on the shelf. This can influence the spacing between your shelves if you have multiple layers. Attention to detail in your measuring techniques during this phase will pay off significantly for the overall aesthetic and structural integrity of your project.
Preparing Your Workspace
Creating an efficient workspace setup is crucial for any woodworking project. A well-organized area not only enhances productivity but also ensures that you have all necessary materials and tools at hand. Begin by designing a layout that prioritizes accessibility and safety while you work.
Organizing Your Tools and Materials
Start by categorizing your tools and materials. Consider arranging them into the following groups:
- Hand tools: Keep essential tools such as saws, hammers, and screwdrivers close at hand.
- Power tools: Ensure these are plugged in and easily accessible but store cords safely to avoid tripping.
- Materials: Stack wood and other supplies neatly to avoid clutter and create a clean workspace.
Using pegboards or toolboxes for organizing tools can improve your woodworking efficiency. Keeping similar items together plays a vital role in preventing chaos during the project.
Safety Measures to Consider
Prioritizing woodworking safety will protect you from potential accidents. Always wear safety goggles to shield your eyes from dust and debris. Gloves can provide extra grip and protect your hands from splinters or sharp edges. Some important safety guidelines include:
- Making sure your workspace is well-lit to spot hazards.
- Maintaining a clutter-free environment that minimizes the risk of accidents.
- Storing equipment safely when not in use to prevent mishaps.
By following these organizing tools and safety measures, you can establish a functional and safe environment for all your woodworking activities. Your workspace plays a foundational role in the success of your projects.
Cutting the Wood: Step-by-Step Guide
When embarking on your woodworking project, precise cutting wood is vital for ensuring that each piece fits together seamlessly. A reliable wood cutting guide can help you achieve the best results. Follow these steps to make accurate cuts and hone your woodworking techniques.
Begin by measuring the wood accurately. Use a tape measure to get the exact dimensions you need. Mark the cut lines clearly with a pencil for easy visibility. Consider using a square to ensure that your lines are straight and at the correct angles.
Next, choose the appropriate saw for your cutting needs. For straight cuts, a table saw or a circular saw is ideal. If you require intricate shapes, a jigsaw will provide the flexibility you need. Make sure your blade is sharp to ensure clean cuts and minimize splintering.
- Set up your saw according to the manufacturer’s instructions.
- Secure the wood piece firmly in place using clamps, preventing it from moving while cutting.
- Follow your marked lines carefully, maintaining a steady pace and pressure as you cut.
Once you complete cutting wood to your desired dimensions, assess each piece. Look for any rough edges or splinters. A small sanding block can help smooth these areas, ensuring your shelf components fit cleanly together.
With these woodworking techniques, you'll be well on your way to creating a beautiful wooden shelf. Remember, taking the time for precise cutting will yield better results and enhance the overall stability and appearance of your finished project.
Assembling the Wooden Shelf
Assembling shelves requires careful attention to detail to ensure a sturdy final product. Properly joining wood pieces will enhance shelf stability and extend the life of your project. Various joint securing methods exist, each offering unique benefits based on your design and materials. Choosing the right technique is essential for achieving durable and functional shelves.
Securing Joints for Stability
Begin your assembly with the right joint securing methods. Here are several effective techniques to provide the necessary stability:
- Doweling: This method involves drilling holes into adjoining pieces and inserting wooden dowels to create a strong bond.
- Screwing: Utilizing screws allows for a quick and firm assembly. Ensure pilot holes are made to prevent wood splitting.
- Glue: Using wood glue in conjunction with screws or dowels creates a robust connection that increases shelf stability.
- Brackets: For heavy loads, adding brackets underneath the shelf can distribute weight more evenly and secure joints further.
Combining these methods may enhance the integrity of your shelves, enabling them to withstand the test of time. Pay close attention to the placement and alignment of each piece during the assembly process. A secure and well-constructed shelf not only serves its purpose but also contributes to the overall aesthetic of your space.
Finishing Touches: Sanding and Painting
Once your wooden shelf is assembled, focusing on the finishing touches will elevate its appearance and durability. Proper sanding techniques play a crucial role in achieving a flawless finish. Start with coarse sandpaper to remove any rough edges, then gradually transition to finer grits for a smooth surface. Pay special attention to corners and joints to avoid sharp areas that could be uncomfortable.
Shelf painting is another significant step in this process. Choosing the right product, such as Minwax stains or quality acrylic paints, allows you to customize the color while ensuring protection against wear and tear. Before applying paint, ensure the wood surface is clean and dust-free, which will enhance adhesion and the overall look of your final finish.
After painting, let the shelf dry completely, and consider adding a layer of clear varnish for additional protection. This final finishing touch can protect against scratches and moisture, helping to maintain your shelf's beauty over time. By investing time in these details, your DIY project will not only be functional but also a striking addition to your space.
Woodworking Shelf: Customization Options for Personal Style
When you embark on the journey to customize your woodworking shelf, the possibilities are endless. Personalizing your shelves not only enhances their functionality but also allows them to reflect your unique style. One popular method involves experimenting with different finishes, which can dramatically change the shelf's appearance. Options range from classic stains to vibrant paints that showcase your personality.
Incorporating decorative shelving elements can also add intrigue to your design. Consider using unique brackets or unexpected materials to create a visually appealing contrast. For example, pairing wooden shelves with metal brackets might introduce an industrial touch to a modern space. Think about integrating various shapes and sizes of shelves for dynamic visual appeal.
Additionally, utilize innovative painting techniques to elevate the look of your shelves. Techniques such as stenciling or ombre effects can make the shelves stand out in any room. When you embrace styling shelves according to your vision, you give them an exclusive character that compliments your home decor. Experiment with contrasting colors, textures, and shapes to create a harmonious display that is truly your own.
Explore these options with creativity and joy, transforming your wooden shelf into a statement piece that resonates with your individual style.
Mounting Your Wooden Shelf Securely
Successfully mounting your wooden shelf requires careful consideration and the right tools to ensure a durable and safe installation. Begin by selecting appropriate shelf hardware, such as brackets or wall anchors, which can provide the necessary support for your shelf’s weight and contents.
To achieve a secure shelf installation, it is crucial to locate the wall studs. Use a stud finder for accuracy, or gently tap on the wall until you hear a solid sound, indicating a stud's presence. Mark these locations, as mounting shelves directly to studs offers the best support. If you cannot align your shelf with studs, use heavy-duty wall anchors designed for the specific weight limit of your shelf.
When mounting shelves, first attach the brackets to the wall at the stud marks or appropriate anchor points. Use a level to ensure that your brackets are even. After securely fixing the brackets in place, you can place your shelf on top, ensuring a tight fit. This method allows for both aesthetic appeal and functionality without compromising safety.
Before you hang your shelf, double-check all connections to guarantee they are tight. This attention to detail will help prevent any potential accidents, ensuring that your newly mounted shelf remains a reliable addition to your space.
Common Mistakes to Avoid While Building a Shelf
Constructing a wooden shelf can be an enjoyable DIY project, but certain pitfalls can lead to frustration and unsatisfactory results. Awareness of common woodworking mistakes, particularly those related to dimensions and materials, can improve your chances for success. Here, you will find some crucial tips to help avoid shelf construction errors.
Miscalculating Dimensions
One of the primary woodworking mistakes that DIY enthusiasts encounter is miscalculating dimensions. Proper measurements are vital for ensuring your shelf fits in the intended space and has the right proportions. Always measure twice before making cuts. Using a reliable measuring tape and a square helps maintain accuracy.
In addition to linear dimensions, consider the thickness of the wood and the weight it needs to support. Utilizing proper calculation methods during the planning stage minimizes the risk of costly errors. Review your plans and measurements carefully to avoid frustration later in the construction process.
Maintenance Tips for Your Wooden Shelf
After building your elegant wooden shelf, ensuring its longevity requires proper attention. Regular wooden shelf maintenance is crucial for preserving its beauty and functionality. Start with routine dusting. Use a soft cloth to gently wipe down the surface, preventing dust build-up.
Avoid exposing your shelf to moisture. Water can warp or damage wooden furniture, leading to cracks and losing their structural integrity. If you notice any spills, clean them immediately with a dry or slightly damp cloth.
Periodic refinishing plays a vital role in care for shelves. Depending on the type of finish you used initially, sanding and applying a fresh layer of varnish or oil will rejuvenate its appearance. This process not only enhances the color but also provides an extra layer of protection against wear and tear.
Consider investing some time in understanding the needs of your specific wooden furniture. Different wood types have varied maintenance requirements, so adapting your approach ensures effective preserving wooden furniture in your home.
- Dust regularly with a soft cloth.
- Avoid moisture exposure to prevent warping.
- Refinish periodically for a refreshed look.
- Learn specific maintenance needs based on wood type.
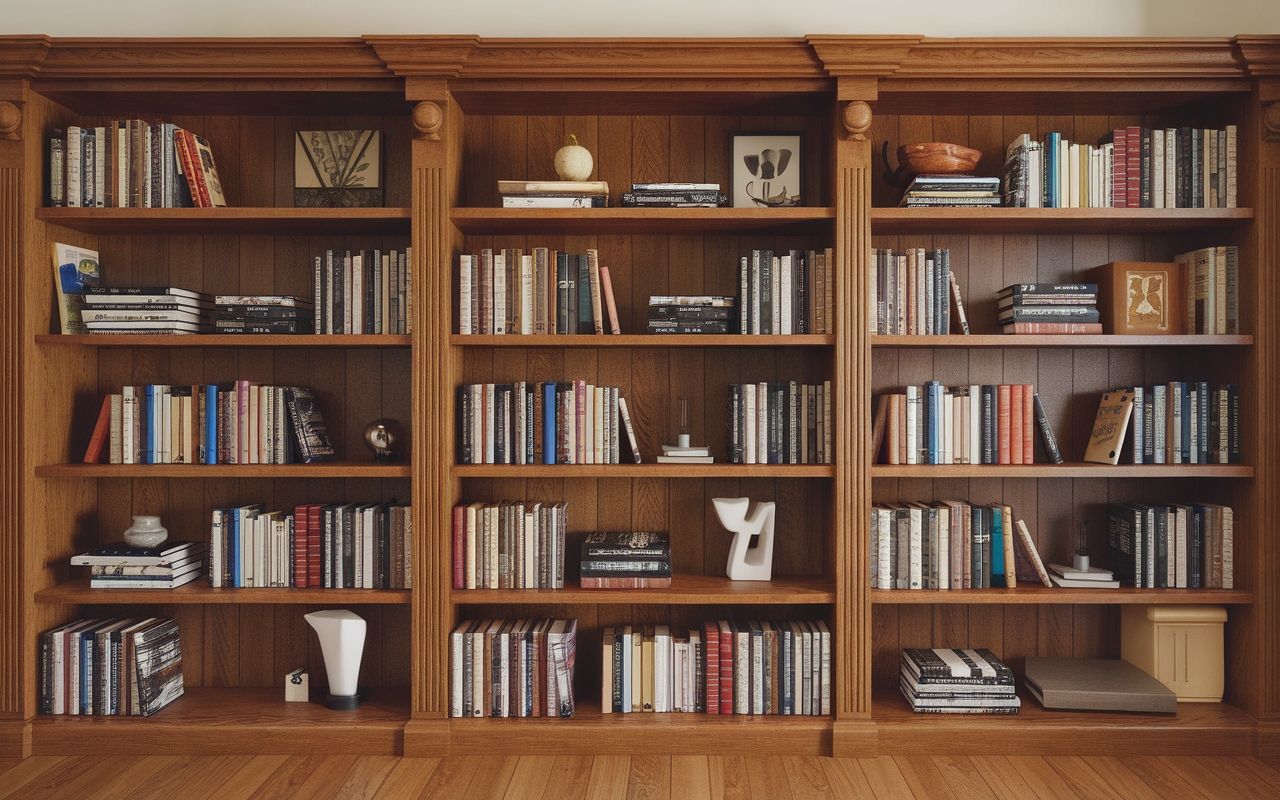
Showcase Ideas for Decor on Your New Shelf
After building your wooden shelf, the next exciting step is styling shelves to reflect your personal taste and enhance your space. There are countless shelf decor ideas that can transform an ordinary shelf into a stunning focal point.
Consider incorporating books in an organized or artistic manner. Stack some horizontally while standing others vertically to create visual interest. Add small decorative items on top of horizontal stacks for an eye-catching touch.
- Add plants for a fresh, vibrant look. Succulents or trailing vines can bring life to your decorative shelving.
- Incorporate unique vases filled with fresh flowers or dried arrangements to enrich the aesthetic appeal.
- Use picture frames to display cherished moments. Mixing frame sizes and orientations can create a dynamic display.
Thoughtful styling can elevate your space. Experiment with textures and colors to establish a cohesive theme. Combining rustic wood items with sleek modern decor can provide a striking contrast.
Lastly, don't forget to leave some negative space. Open areas allow your decor to breathe, resulting in a more refined display. Embrace these ideas to achieve a beautifully styled shelf that expresses your personality and complements your home.
Inspiration: Stylish Wooden Shelf Designs
When it comes to wooden shelf designs, the possibilities are endless. You can transform your space with a variety of designs that not only serve a functional purpose but also enhance your decor. Think about using creative shelving solutions to showcase your unique style while maximizing storage.
One popular trend involves blending open and closed shelving. Open shelves allow you to display decorative items, while enclosed spaces can hide away less visually appealing items. This combination offers a balanced look and creates a focal point in your room.
Consider the aesthetic of your space. Rustic designs with natural wood finishes bring a warm touch to your home. Clean, minimalist wooden shelf designs contribute a modern and sleek appearance, perfect for contemporary interiors. Experimenting with different stain colors or painting your shelves can add a personal touch to your design inspiration.
To inspire your own creative shelving projects, here are some stylish ideas to consider:
- Floating shelves for an elegant, streamlined look.
- Corner shelves to utilize often-overlooked spaces.
- Custom-built units that fit your specific needs.
- Tiered shelving for a unique, eye-catching arrangement.
By exploring these stylish wooden shelf designs, you can find the perfect inspiration to enhance your home, taking your interior decor to the next level while keeping organization in mind.
Summary
As you complete your DIY shelf project, take a moment to reflect on the skills and knowledge you've acquired throughout this woodworking guide. Each step you undertook was an opportunity to explore your creativity and craftsmanship. You have not only built a functional piece of furniture; you have also ventured into the rewarding world of woodworking projects that can enhance your living space.
This DIY shelf recap serves as a reminder of the potential that lies in your hands. Woodworking is not just a hobby; it’s a path to creating bespoke items that fit your personal style and needs. Whether you choose to build more shelves or expand into larger projects, the foundational skills you've developed will empower you to take on any challenge ahead.
Embrace the satisfaction that comes with crafting something unique. The journey of woodworking offers endless possibilities, encouraging you to design and build more functional pieces for your home. Remember, each project is a chance to learn and improve, making every new build an exciting adventure.
Related Articles
The Best Wood for Furniture: Strength, Durability and Aesthetic ChoicesBest Wood Glue for DIY Projects: A Guide to Strong & Secure Bonds
Best Woodworking Books & Online Resources to Learn the Craft
Choosing the Best Workbench for Your Garage or Small Workshop
Top 10 Common Woodworking Mistakes & How to Avoid Them
Shop for Woodworking Tools on Amazon